Be sure to check out the first part of Your Caboodle settings guide before going through this. So we’ve covered 3 sections of your settings so far, and here we’ll go over another 3 sections.
Newsfeed Settings
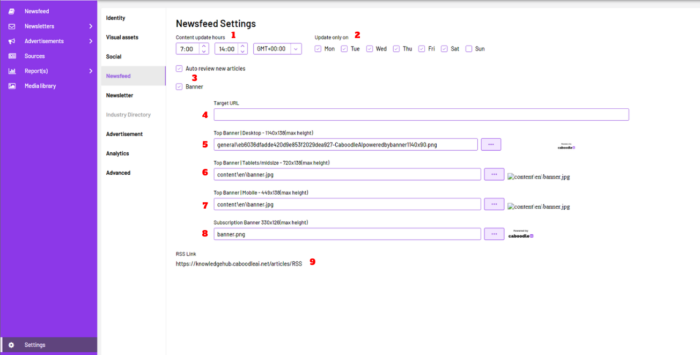
This is the newsfeed setting section, where you’ll be able to manage everything on your newsfeed, From layout to background and content as you can see with 1-9 in the image above.
1- Content update hours: The content update hours are the time period where Morla, our AI will aggregate content from your sources. The content is aggregated twice, and you can set your preferred time as seen above.
2- Content update days: Just the same concept with the update hours, but instead you get to control the days that content aggregates on the hours set in 1.
3- Checkboxes to auto-review all your articles in your draft newsfeed and whether or not to include the banner in your newsfeed.
4- Target URL: This field indicates the URL redirect from clicking on any of your banners in 5-8.
5- Top Banner (Desktop): This is the banner image that you can have on your newsfeed, the recommended size for this is shown, as it is what will be displayed if you’re viewing from a desktop computer.
6- Top Banner (Tablet): This is the banner image that you can have on your newsfeed, the recommended size for this is shown, as it is what will be displayed if you’re viewing from a tablet or notebook.
7- Top Banner (Mobile): This is the banner image that you can have on your newsfeed, the recommended size for this is shown, as it is what will be displayed if you’re viewing from a mobile phone.
8- Subscription Banner: The subscription banner is located at the bottom of your site in your newsfeed.
9- RSS Link: The RSS link is available here, and connects to your newsfeed. You can copy it and include it on a website. For more info, you can check our RSS feed guide.
Now that we’ve gone over the Newsfeed settings, let’s go over the Newsletter settings.
Newsletter Settings
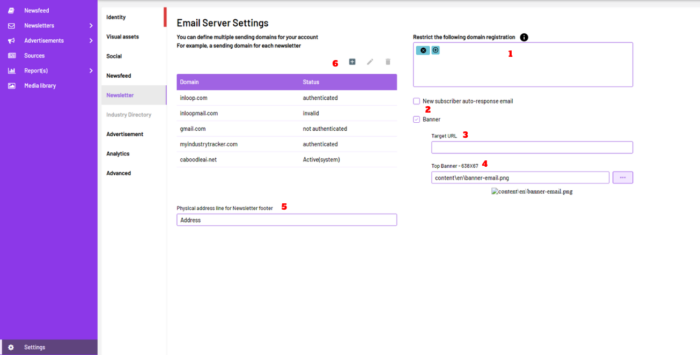
In the Newsletter section, you get to set up email domains and other features. This basically controls the backend of how your newsletters work, and we’ll cover them in 1-6 above.
1- Domain Access: This field is for inputting email addresses that will be restricted from registering for your newsletter domain. You can see this as some sort of blacklist, as these emails are blocked from interacting with your domain.
2- Checkbox options: The checkbox options for the newsletter are including an auto-response on subscriber action, and also including a banner. You can click on which works best for your content goals.
3- Target URL: This field indicates the URL redirect from clicking on the top banners in 4.
4- Top Banner: The top banner field is shown at the header of your newsletter, our recommended size resolution for this is 1490 x 180px.
5- Physical Address: This is the address section that will be used in the newsletter footer. For this section, you can simply make use of your company address as would be normally shown on your website.
6- Email Domain: This is the final, and most likely the most important section of setting up the newsletter. You can add multiple domains that you want to send newsletters through. To add a domain, click on the + icon as seen, and a new screen will appear:
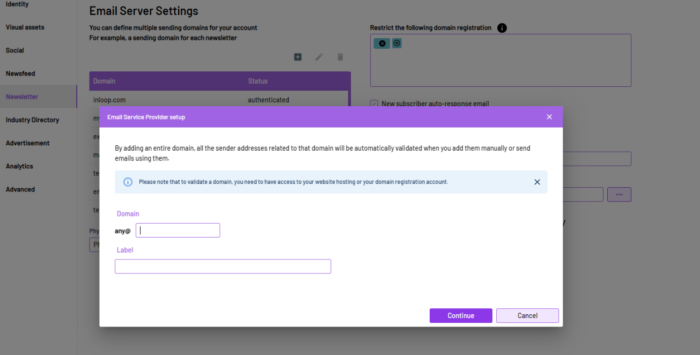
After reading the instructions, you can put in the sending domain and label it with your preferred name. When you have both fields occupied, click on the “Continue” button, and it will follow the process of validation before being saved and showing in the table list on the previous page.
This section might need you to involve the IT guy in your team to properly set things up if you don’t fully understand how the sending domains work.
Now that we’ve looked at the Newsfeed and Newsletter, let’s check out another main feature setting:
Industry Directory
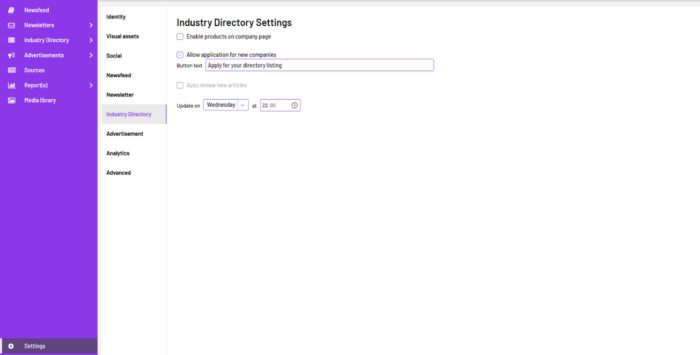
The Industry directory doesn’t have a lot of settings compared to the others, so this won’t take long. In this setting, you can:
-
Enable products on the company page: Enabling products basically means being able to list different product items under each company in your directory.
-
Allow applications for new companies, with the feature to edit the button text for it: Allowing company applications to your directory or not, and the text field to display to them to join.
-
Auto-review content and set days for their update: You can choose for the content going to each company in the directory to be auto-reviewed, and also set the date period for content aggregation from its source.
And that’s that with the second guide on your Caboodle settings. We’ll now head over to the third and final part of this extensive guide on managing your Caboodle portal settings.
If you would like to check out the first guide, see it here. You can also reach out to us at support.caboodle.com if you have any questions or encounter any issues with your settings.


