An audience is the most important part of a business or organisation. CaboodleAI understands this, and we are dedicated to helping you manage your audience base flawlessly with all the content that you provide.
We’ve gone over the Email Sends section under the Newsletter, and if you missed that, you can check it out here. This is the second part of the Newsletter, we’ll be taking a look at the Audiences.
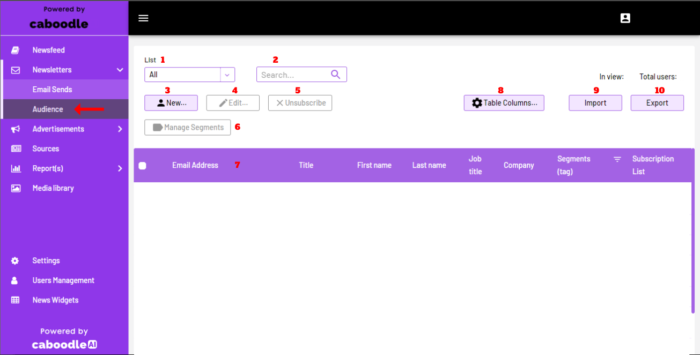
We’ve designed the interface to look similar to how the Email Sends section is, but there are still a lot of distinct features to go through:
1- List: The list bar is a display feature that shows the several groups your audience falls under, it’s pretty similar to the date display in the Email Sends section. There are 5 categories so far, and these include:
-
All: This shows all the audience in your system including all the other categories.
-
Active(opt-in): This shows everyone that has signed up for your content, including your subscribers and trackers.
-
Company Users: This shows the users that are affiliated with your company.
-
Inactive(opt-out): This shows everyone that has unsubscribed from your content.
-
Subscribers: Subscribers can either be those that you import from your database or those that subscribe organically via the newsfeed. This view shows only your subscriber list in your audience.
-
Trackers: Trackers are users that not only subscribe but have a registered user account where they can personalize their newsfeed from you and have their own custom newsletter based on their interests. This view shows only your tracker list in your audience.
2- Search: The search bar makes it easy to locate a certain user in your audience. It works together with the List view whereby you need to select the right filter before doing your search. For example, if you want to search for a user who is a subscriber, and your view is set to the tracker list, your search query would not bring up a result.
3- New: Over here is the button for manually adding a user to your audience list.
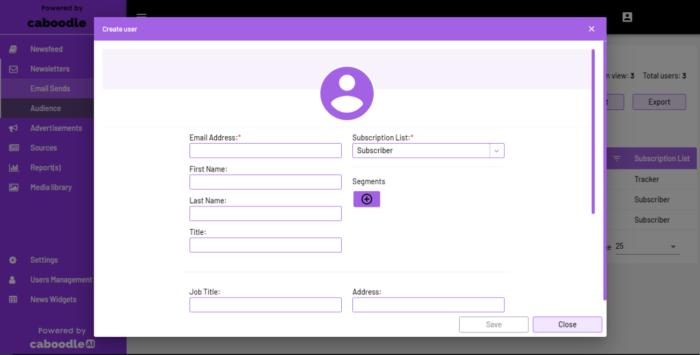
As you can see above, several fields are input in creating your user. Most of which is self-explanatory, but the two fields we want to give more insight into are the Subscription List and Segments.
Subscription List: You can choose to group the user under Subscribers, Trackers, or ContentProviders. Content Providers are companies signed up to your industry directory to provide content to users of their own.
Segments: Segments are just another way to group your audience. With segments, you can specify where the user falls under. The popular segments used by companies include portal-subscriber, test-user, active-subscriber and others, it all depends on you.
4- Edit: This feature helps to change the details of a certain user. You can change all the fields that have been filled in from New.
5- Unsubscribe: You can unsubscribe a user from your audience through the Unsubscribe button, it works similar to how delete works on the Email Sends, but the user still remains in the database, but will no longer receive any of your content, either on the newsfeed or the newsletter. We’re also working on adding a Delete feature, so hang in for that update.
6- Manage Segments: This shows all the current segments you have created and helps you manage them effectively.
7- Table Fields: The table fields are displayed based on the format in the New/Edit features.
8- Table Columns: With Table Columns, you can edit your Table Fields according to which field you wish to see in your view. With this, you can include system-generated fields that will help in tracking and managing your audience list better.
9- Import: This is the second way you can add to your audience list, by importing them directly to your list. Clicking on this opens up a screen as seen below:
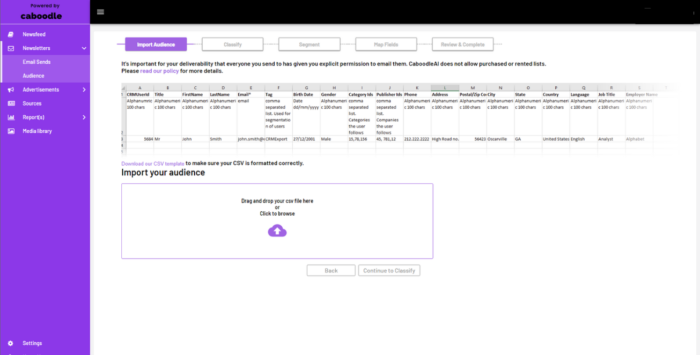
The Import section is divided into 5 simple stages, these include:
Import Audience: This is the first page as seen above. You’ll see a brief guide on the format and style of the file to upload in order to have a seamless import. Click on the cloud upload icon and upload your chosen file, then click on “Continue to Classify.”
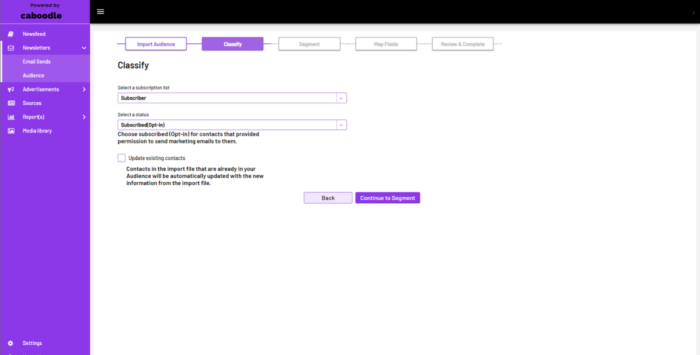
Classify: On the next screen, you’ll need to specify what list your import would be going to. This would either be Subscriber, Tracker or Content Provider. You will also choose the status of your import if it will be users opting in or opting out. The last feature on this screen is a box to tick that updated your current audience if there is matching info to be updated. Once you’re done, click on the “Continue to Segment.”
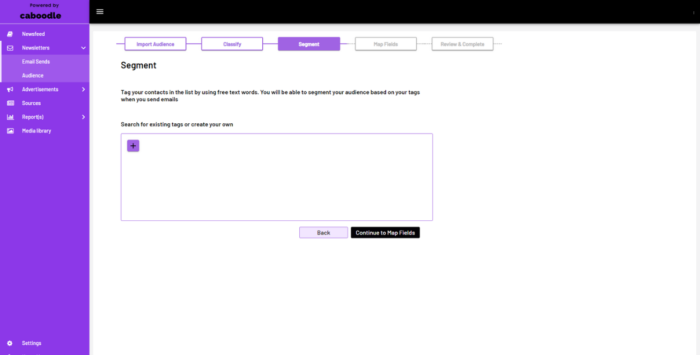
Segment: The Segment section helps you group each user in your import file into certain segments. It works just the same way you create segments when creating and editing a new user. You add a segment by clicking on the “+” icon as seen above. Once you’re done, click on “Continue to Map Fields.”
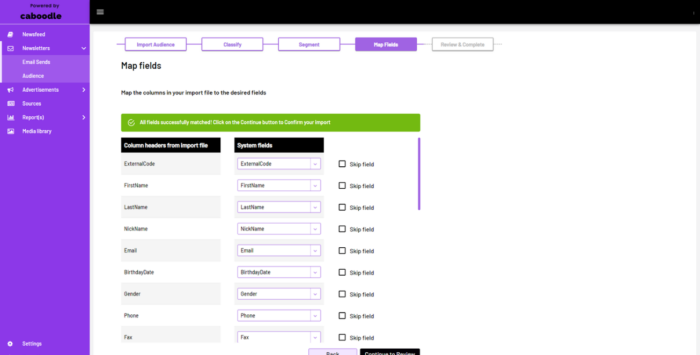
Map Fields: In this penultimate stage, you would need to verify that your import file matches properly with the audience list you have. As you can see above, you’re able to pair the “Column header from import file” with the “System Fields”. At the right of each pairing, you can tick the “Skip field” box if you don’t want to match that specific field, and it’ll be standalone by itself. Once you’re done, click on “Continue to Review ” below.
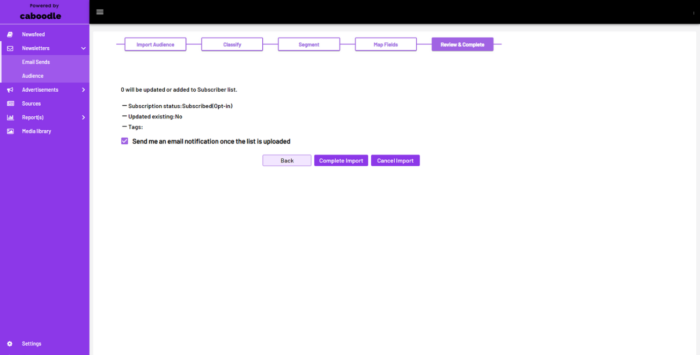
Review and Complete: This page displays the summary of your import and all the changes that will be updated at the end of the process. Once you’re ready with all the details, click on “Complete Import” and you’ll be set.
10- Export: If you want to make use of your audience list outside of your Caboodle site, you most definitely can! With the export button, you’ll be able to do just that, just click on the button and you’ll download your entire audience list in a single CSV file.
And now you’re ready to send your Newsletters and manage your audiences. We know it might feel a bit overwhelming, but just take your time to go over this and check it out on the live site, and it’ll be stuck with you in no time.
Have any issues managing your audience? Feel free to get in touch if the issue falls in these categories or others;
- My audience list isn’t showing correctly.
- I didn’t receive an email after importing my subscribers.


