Setting up a newsletter usually takes up more time compared to when you send out a test for review. However, sending out a test tends to take longer than usual when you want to send it to just one user, a group of users or any other custom setting.
Previously, this would involve having to take out the emails one after the other with no way to save the previous set, and then repeating the process all over again for a different scenario.
This is why we’ve made an update to this functionality of the newsletter in order to save more time when sending newsletters to your audience, and it’s something we’d like to call Test User Groups.
Test User Groups is a new way to save test emails in different groups based on who needs to get a test newsletter. With this feature, you can create several groups of different emails and simply choose from any when you want to send a test.
In this guide, we’ll go over creating a group, editing a group and selecting a group for the newsletter test.
To start, head over to the newsletter draft and click on the “Send Test” button as you’d normally do, and you’ll see the new screen below:
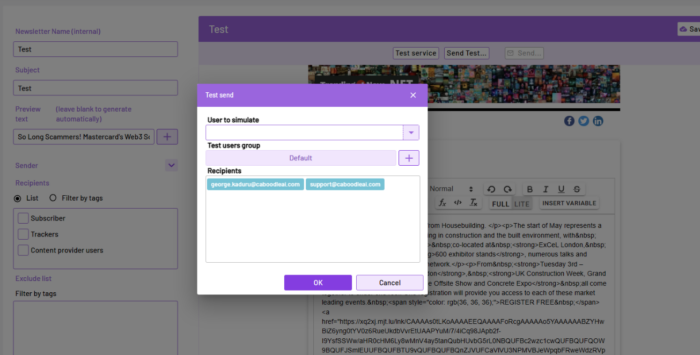
As seen above, the Test user group shows up on the test window. Along with this feature, we created a Default group that has the usual email addresses for sending tests. From the example, there are only two emails in this default group, and it will differ for you based on the number of email addresses already put in the test email window before the feature update.
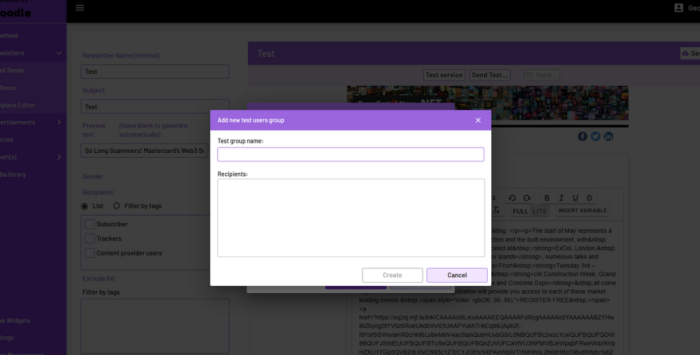
To create a custom group, click on the + icon on the page above and a new window will pop up with the group name and recipient boxes to fill in:
Once you’re done, you’ll have a new group of emails to choose from. To edit and select a group, you can take a look at this clip that shows how to edit a given group, and also select a group to send the test to:
Now that we’ve covered this feature, you might be asking, how do I send to a single user instead of a group? Well, there are two ways to do this:
1. You can either create a group of one and add just one email with the group name being the name of the user.
2. Or you can use the “User to Simulate” feature on the main test window by typing in the email address of the user that already exists in the system. If the user doesn’t exist in the system, then you would have to create the user profile as a member, you can check our User Management guide for more help with that.
Feel free to reach out if you have any questions or would like to see any new features implemented to better serve your needs, as always we’ll be right with you!


